 I’m very excited to introduce you to Pascale Arpin, who is ARCTICdeco’s first guest blogger! Pascale is a brilliantly talented artist, teacher, and all round lovely lady who came to Iqaluit in 2011 from her home city of Ottawa. She came to Iqaluit out of curiosity and has made this community her long-term (we hope) home. She’s done some incredible work on her first home and major fixer-upper, including this incredible bathroom reno – which puts my little renovations to shame, might I add. She too has begun documenting her reno journey on her blog Cold World Reno, so be sure to bookmark it for exciting future updates.
Now sit back and enjoy her story.
* * * * * * *
In recent months, nearly every time I’ve run into a friend at the store or on the street it seems that I am always greeted with the statement “Long time no see!” and the question “Where have you been!?”. Aside from the legitimate time I spent in other Nunavut communities throughout the month of March, my general absence during the other six months can only be excused by the fact that my spare time has been consumed by renovations.
Since purchasing my first home in November 2013, I have spent nearly all of the time and energy I have left at the end of the workday and on week-ends working on the house. Now, after months of hard work, I have slowly begun to crawl out from under a large pile of drywall chunks and rotten wood to share the incredible progress that is finally starting to materialize.
It was a happy coincidence that I ran into Colleen, whose ARCTICdeco blog has been my online go-to when I need to remind myself that “It’s ok, you’re not alone, and the results will be awesome”, as I was just beginning to share photos of the renovations with friends and family. To give you a bit of context, my family still didn’t know what my home looked like—at all!—because I wanted to be far enough into the renovations to handle any criticism or discouraging comments along the lines of “Wow, that place is a real dump!”.
Flash-forward a week later, and here I am writing a guest-blog entry for ARCTICdeco. I am so excited to share some of the trials and tribulations of my first home renovation and have decided to dedicate this post to the journey of finding & fixing the problems in a bathroom.
- Follow Your Nose & Question Everything (Including the Home Inspector)
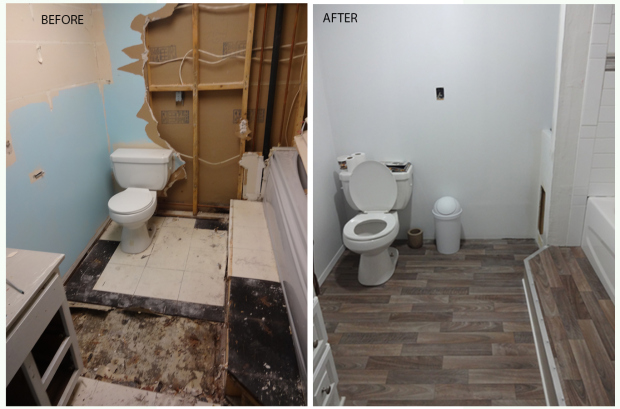
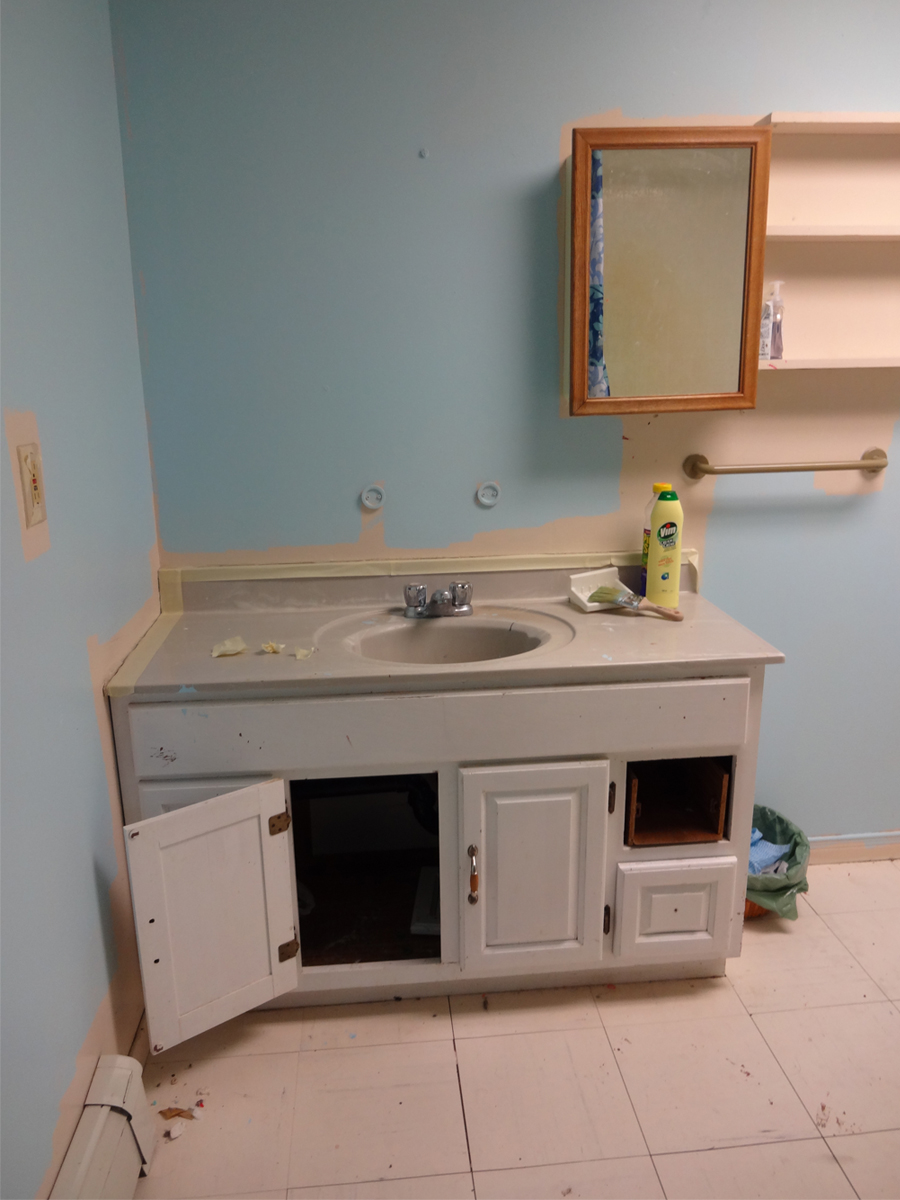
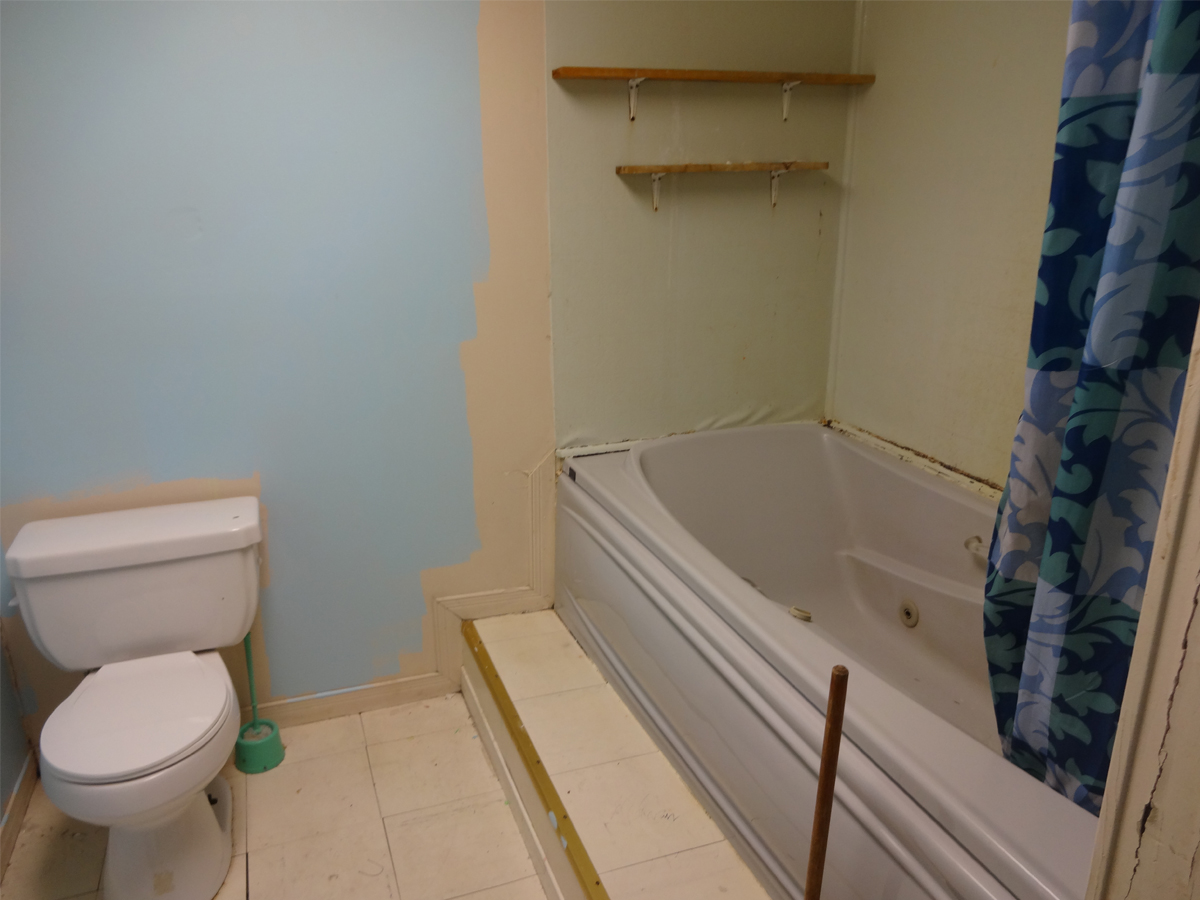
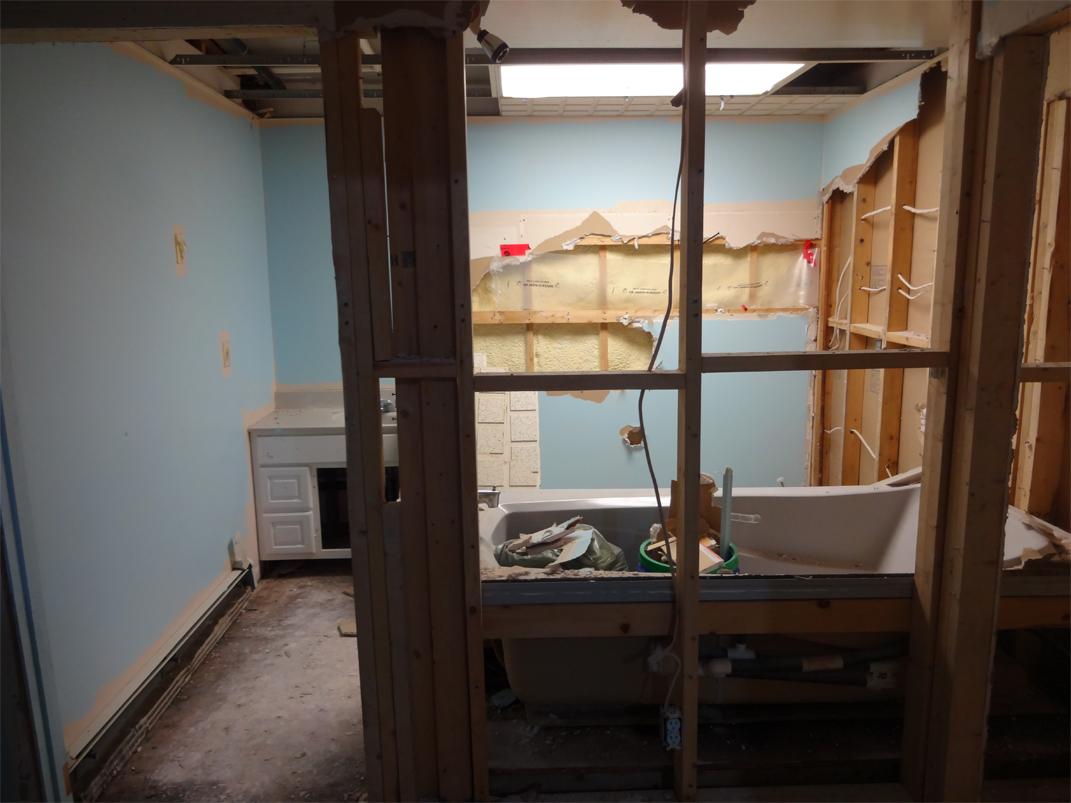
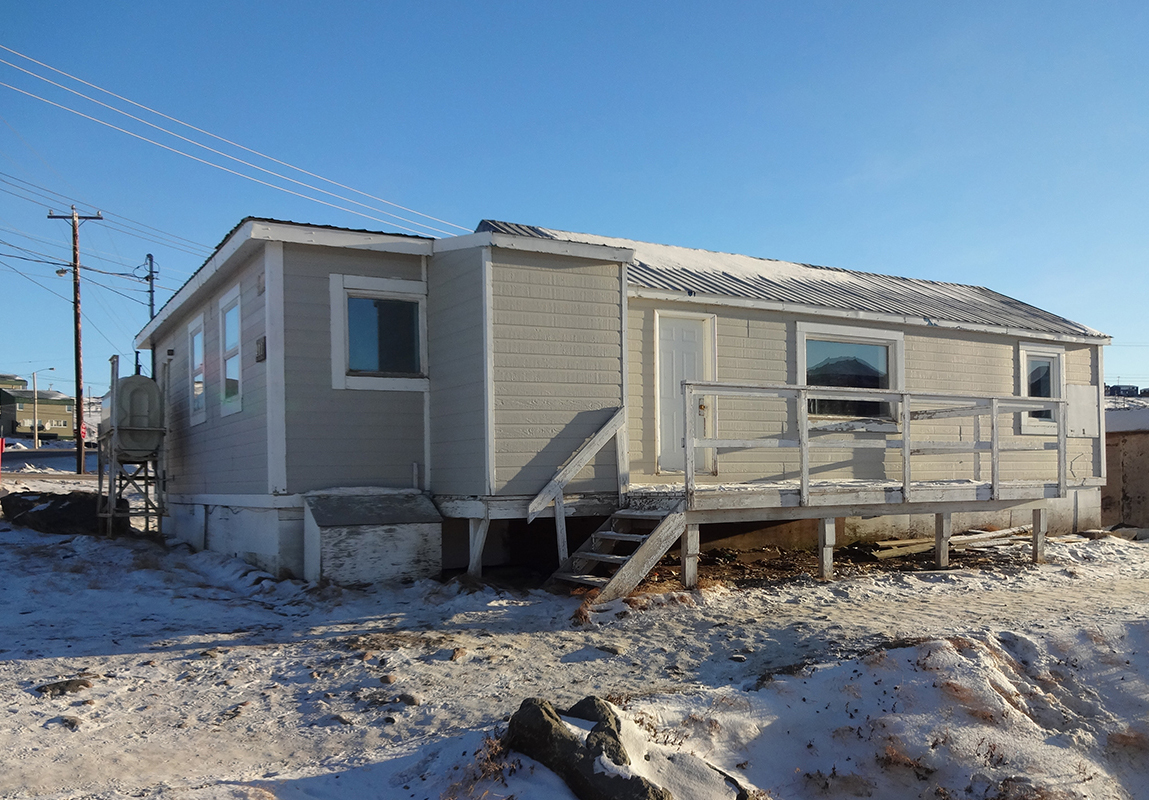
Let me begin with a “Before” picture. Although clearly run-down, the bathroom (according to the home inspector) showed no obvious signs of water damage. While this may have been his technical answer, he suspected there may be some around the bath, which came as a surprise as I was convinced that the entire bathroom was essentially a cesspool of rot and mildew. I knew this, not because I have any sort of experience with old bathrooms, but because of the smell of, well, rot and mildew, that made the room that much more repulsive.
The inspector agreed that the bathroom was in need of TLC, the extent of which would only be known by tearing off some mouldings and drywall. What I learnt is that home inspectors are very careful with the words they choose so that they neither say too much or too little. The inspector I had seemed unwilling to speculate beyond visible damage, which meant that he did not dare discuss anything beyond the surface. Whether you are purchasing an old home or a new home, one of the easiest traps to fall into is to assume that what you see is what you get. Needless to say, I had no intention of leaving the bathroom as-is and once the house was mine I started my investigative/demolishing journey also known as: the great bathroom gutting adventure.
- Look Under The Floor
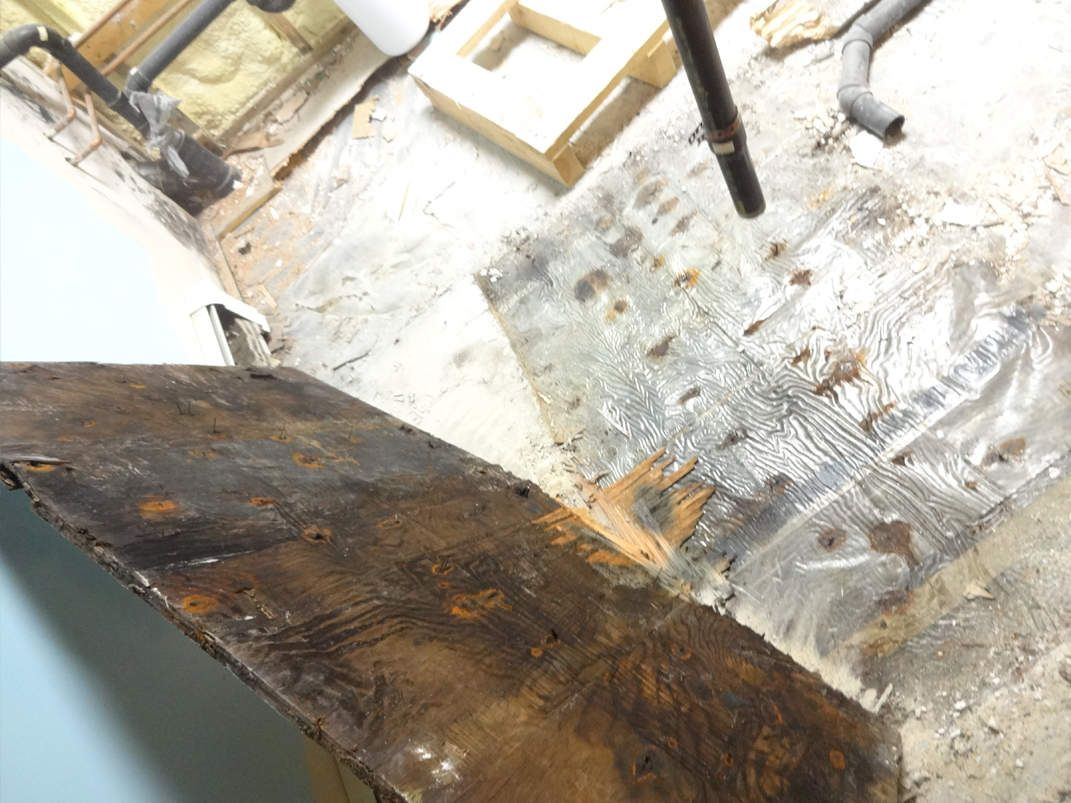
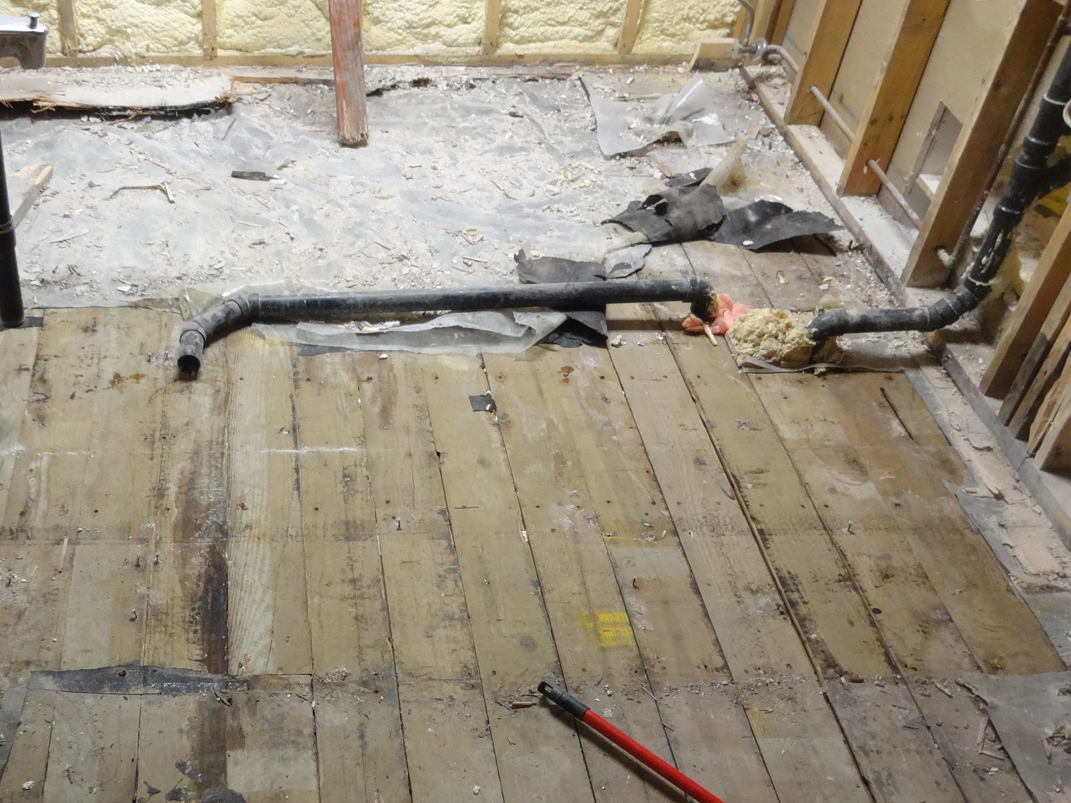
As I had suspected, the bathroom was in fact a cesspool. One of the biggest reasons why the bathroom had reached such a state was the fact that the house had been a rental property since it was built. Furthermore, what I discovered in the bathroom was proof that the owners/landlords had been guilty of applying band-aid solutions to serious issues. The biggest indicator of this was the fact that when I started to demo the bathroom, I eventually went through at least 4 layers of flooring before reaching a very damaged vapor-barrier.
At the time, I was thankful for this plastic sheet as the layer of wood under it (aka: the structure of the house) was dry! Each of the layers of flooring, which included linoleum tiles, wood, linoleum sheets and more wood, were each more rotten, mildew-ridden and actually wet than the next. The problem here was clearly that by adding more layers of flooring to mask/hide the old ones, the owners had only made the problem worse, without ever addressing the real issue of water damage—as well as the source of that damage.
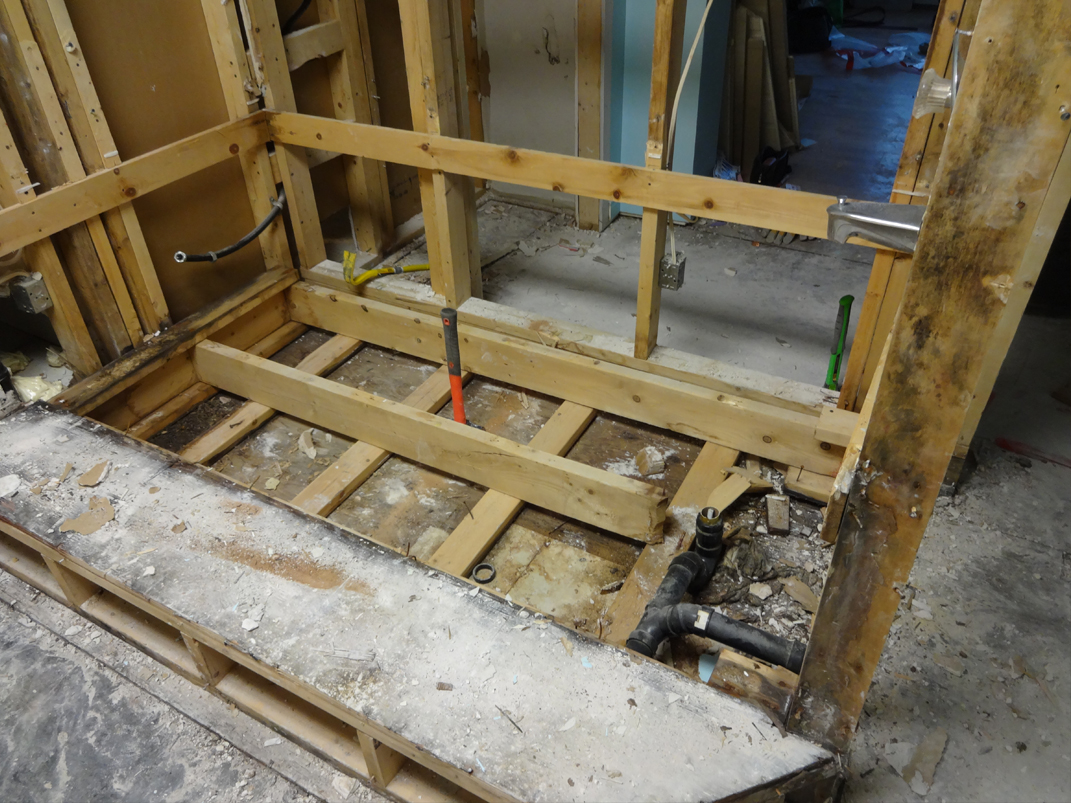
Countless hours were then spent ripping out the old layers of flooring, one by one. This process also entailed dismantling the vanity and bath-tub/base (which has warranted a whole section of its own—see below).
- Look Behind The Walls
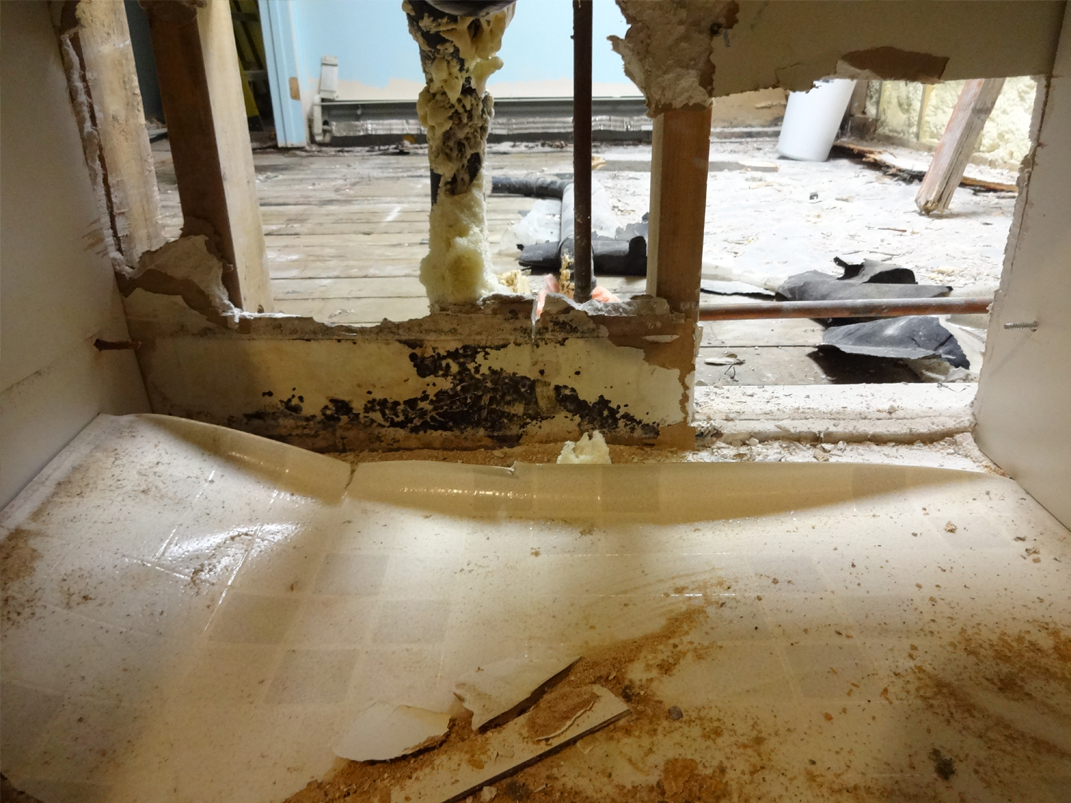
The demolition of the floor took place in conjunction with the general demolition of the walls and bath tub base. Each step along the way revealed significant water damage coming from the pipes and tub. The problem here was obviously a combination of water leaks and poor insulation at the spot where the drain-pipes come through the floor from beneath the house, only worsened by the fact that the bathroom had no exhaust vent, which meant that the humidity from every shower or bath allowed for more mildew and mold growth.
When I started to rip apart the walls and pipes, certain areas around the tub showed significant signs of mold, while other parts remained intact. I ended up taking out most of the drywall as well as the entire bath base as the wood of the base, as well as below, was completed rotted and moldy.
- Get To The Bottom Of It
Once the bathroom had been stripped of floors and walls, the sources of water damage were clear. The biggest indicators were: the underside of the pieces of the wood I’d ripped up (on which the rot marks clearly showed where water had spread from) and the pieces of drywall that showed evidence of mold were also limited to specific areas (tub area, sink drain, toilet drain, and tub drain). Thus, it was now time to examine the source of water damage itself and assess what work needed to be done to remedy the problem once and for all.
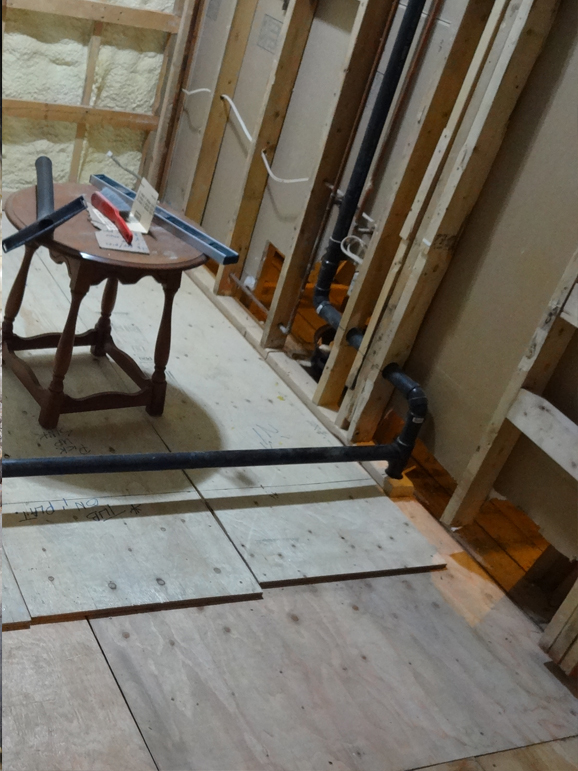
The first visible issue was the bathroom sink, of which the drain had plastic bags, string and tape wrapped around it (if that doesn’t set-off alarm bells then I don’t know what would). Secondly, the tub drain, which also acted as the kitchen sink drain, was covered in an enormous mass of sprayfoam (more alarm bells!!); this was an indication that the pipes had previously had some issues with freezing in the past. The area where the pipes ducked down beneath the house had originally been underneath the tub, and every sign indicated that this had been a highly problematic area for water leaks and poor insulation. Finally, the toilet drain seemed to show minimal water damage, but the pipes beneath the house revealed that it had issues with freezing in the past. More alarming was the fact that the pipe beneath the house was missing a cap, meaning toxic fumes could escape from the drain pipe. It was obvious that the source of the water damage was primarily the pipes and the freezing issues that seemed to accompany them.
- Fix It… For Good!
As a first-time homeowner, and first-time renovator, it is important to know when it is time to hire professional help. At this point, I knew that the problems had to be remedied and for good. Thus, I had no intention of jerry-rigging a solution only to find myself with similar water damage or freezing one of two years down the road. So, I reached out to local plumbers at Lawlor Mechanical for expert advice and their diagnostic included:
- Cutting out the tub drain (which is also the kitchen sink drain)
- Re-locating the tub/kitchen sink drain—especially since I had told them that I was planning on expanding the size of the bathroom by 17 inches
- Replacing the drain pipes under the house
- Putting in a new heat trace to ensure the pipes would no longer freeze (as had been a problem in the past)
It was great that their diagnostic matched the to-do list I had come up with and I gladly hired their services. I gained incredible peace-of-mind knowing that the root of the problem had been addressed and remedied, and that I could then move forward with the renovations without wondering whether the same issues would arise again.
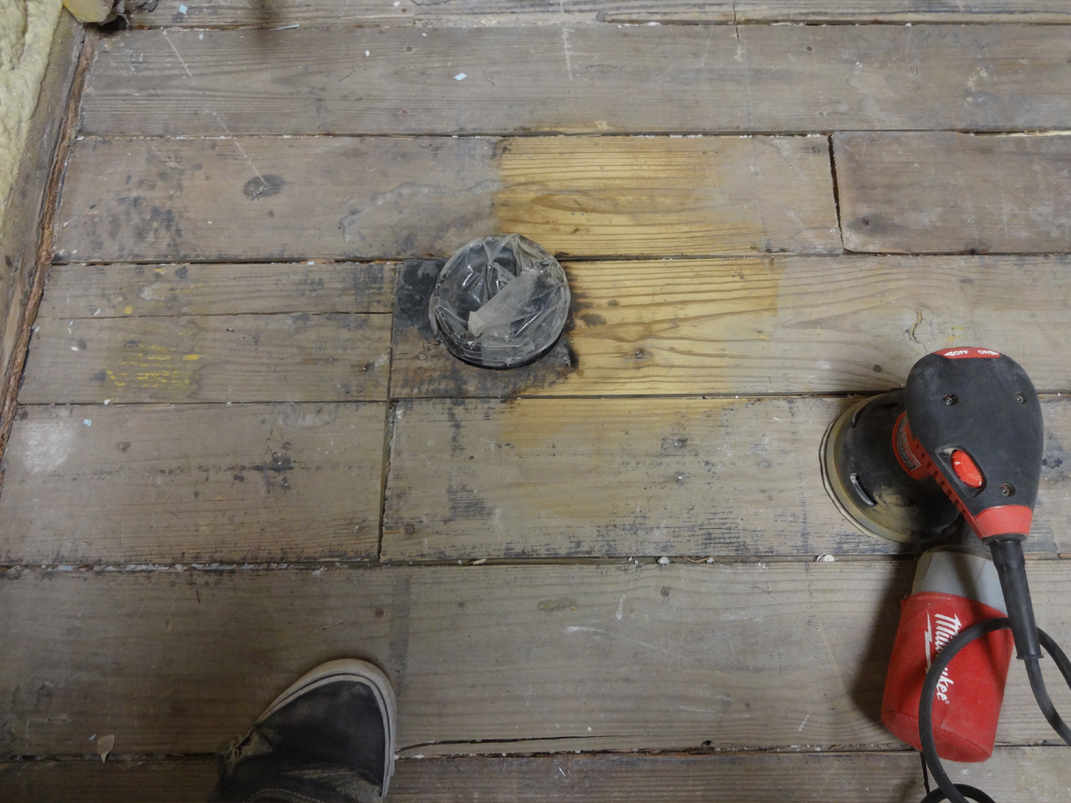
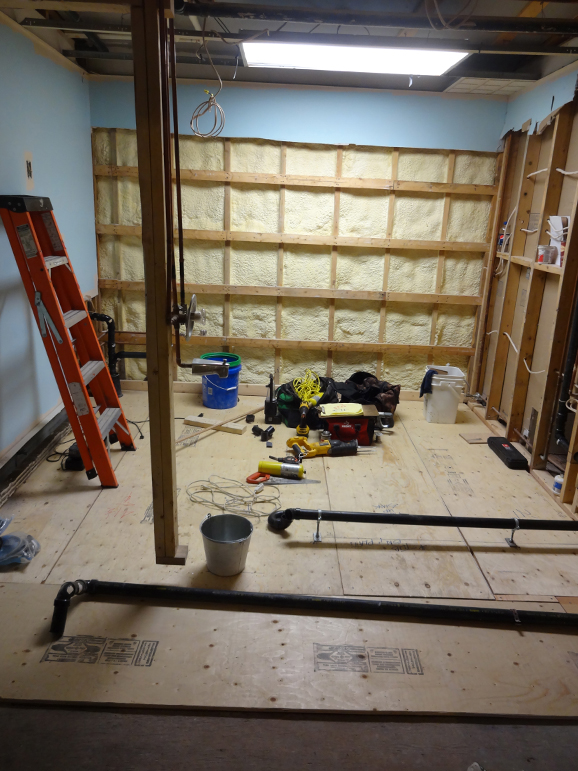
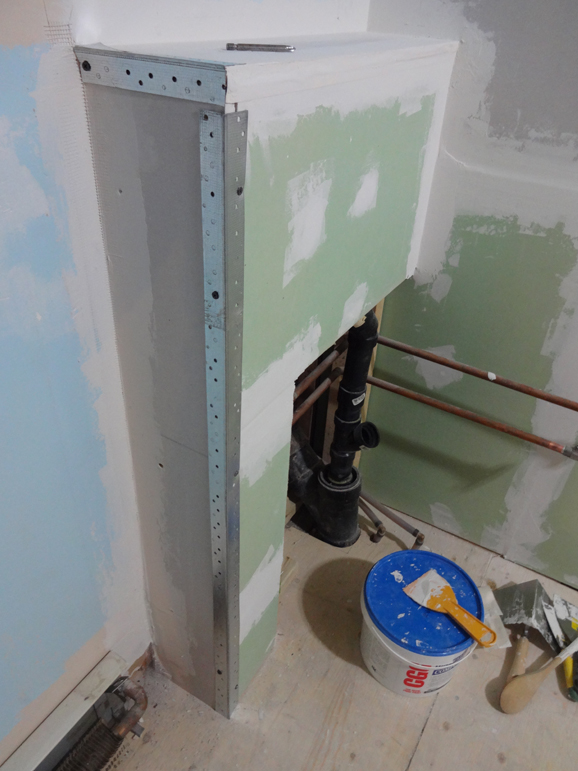
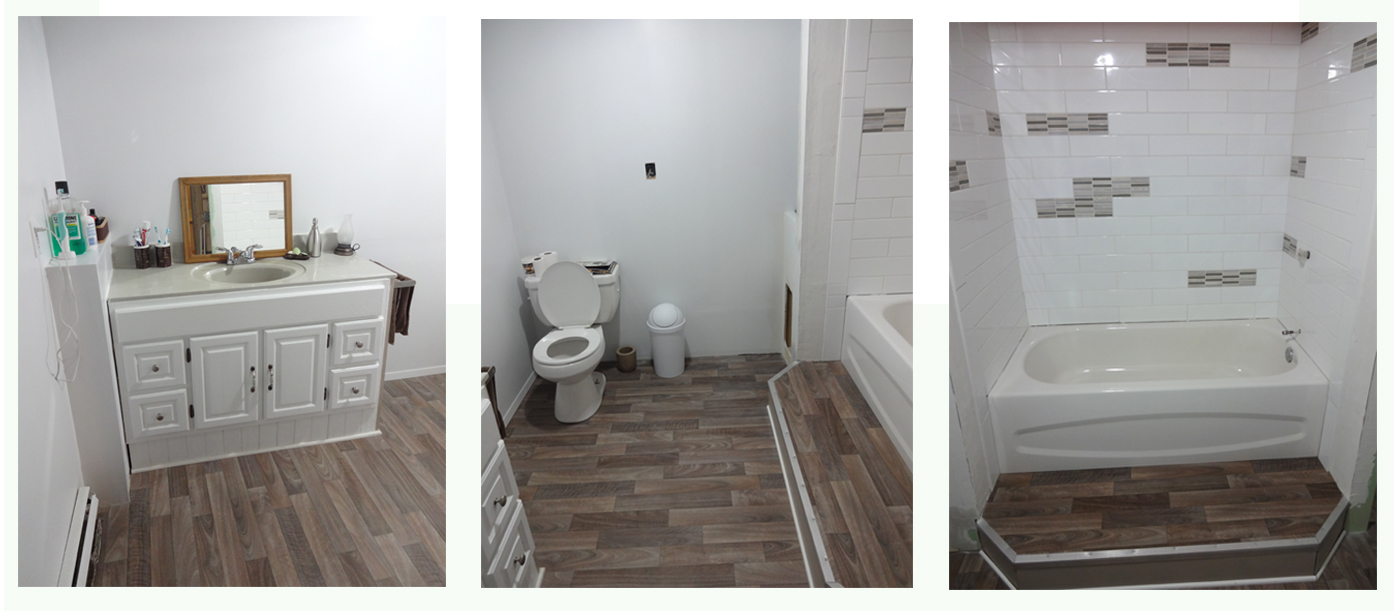
As for the floor, thankfully, with some elbow grease (aka: sanding), signs of water damage on the final layer of wood were remedied and a new sub-floor installed. I installed two layers of new plywood, both a thickness of 5/8, as well as new vinyl flooring. Most importantly, I wanted to make sure that both myself and future owners would have the ability to see the state of the drain pipes at any moment. Thus, I built “hidden” doors that allow anyone to easily look into the drain pipes: one door on the inside of the vanity for the sink drain, one at the end of the tub for the tub/kitchen drain, and one at the head of the tub/shower for the tub drain. No more hidden pipes, no more hidden water damage!
The process of re-building the bathroom has been both extremely challenging and exciting. With each new task representing both a learning curve and a great sense of accomplishment, the bathroom has finally started to look like a bathroom again.
Luckily, my long-time friend and partner moved up in December, which meant an extra pair of extremely helpful hands—and a voice telling me when it’s time to put the hammer down and relax. I look forward to sharing the full journey of the re-build on my blog – so stay tuned to see how it all turned out! In the meantime, here are a few snapshots of the bathroom today:

